
Decoupage art is a technique that involves decorating objects with cut-out paper images, textiles, or other materials. This technique has been around for centuries and is widely used in crafting and decorating.
A Step-by-Step Guide on How to Create Decoupage Art:
- Choose an item you want to decorate.
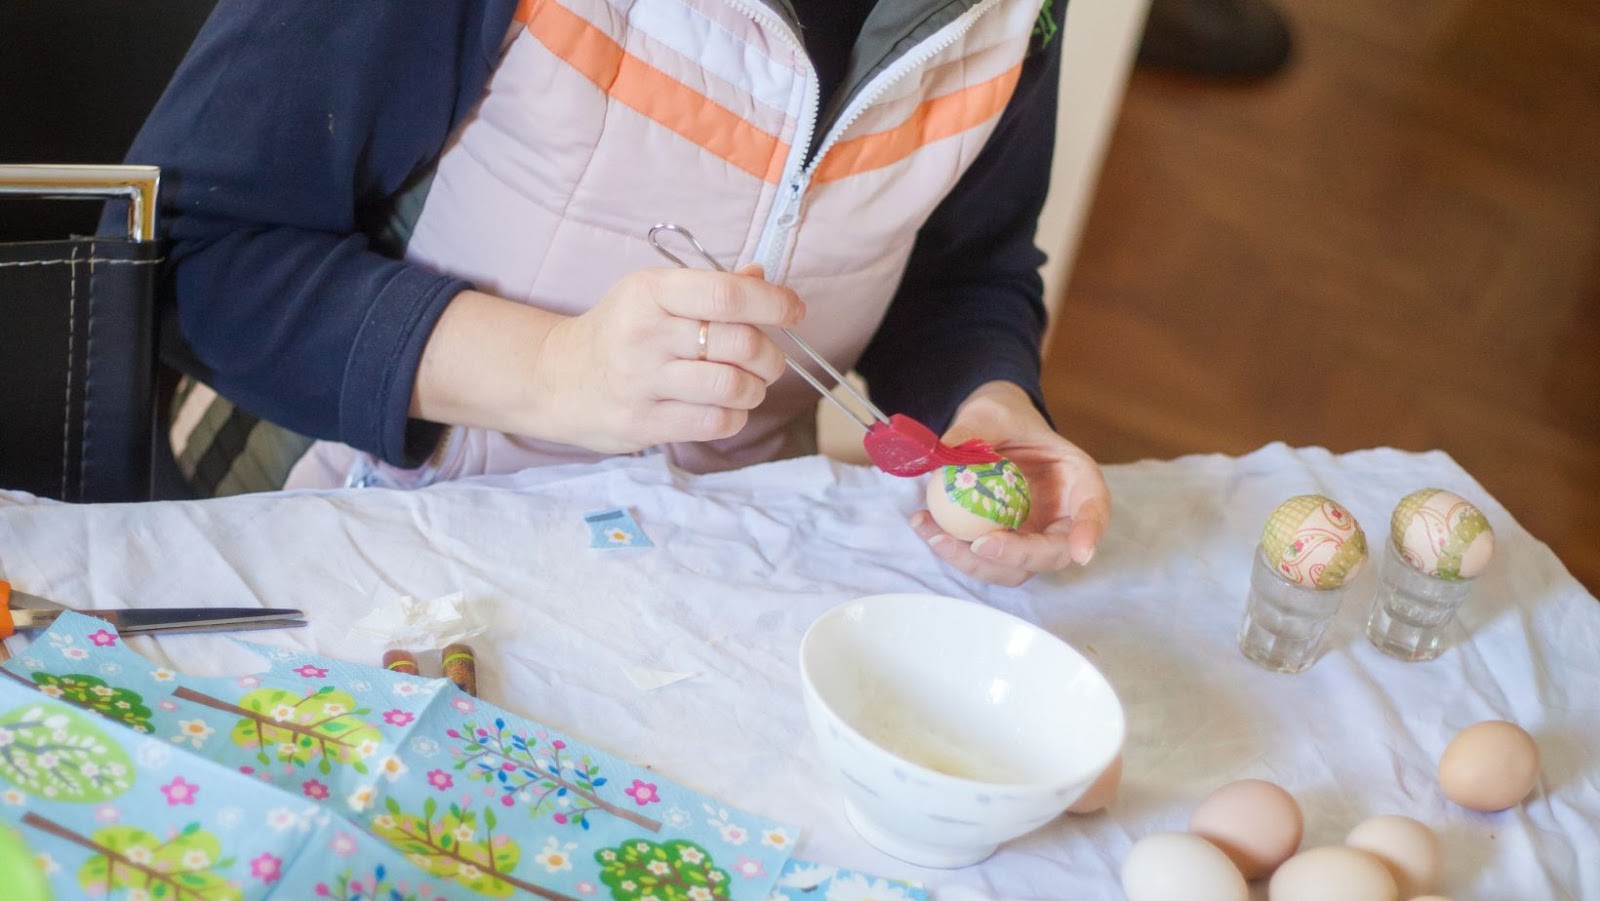
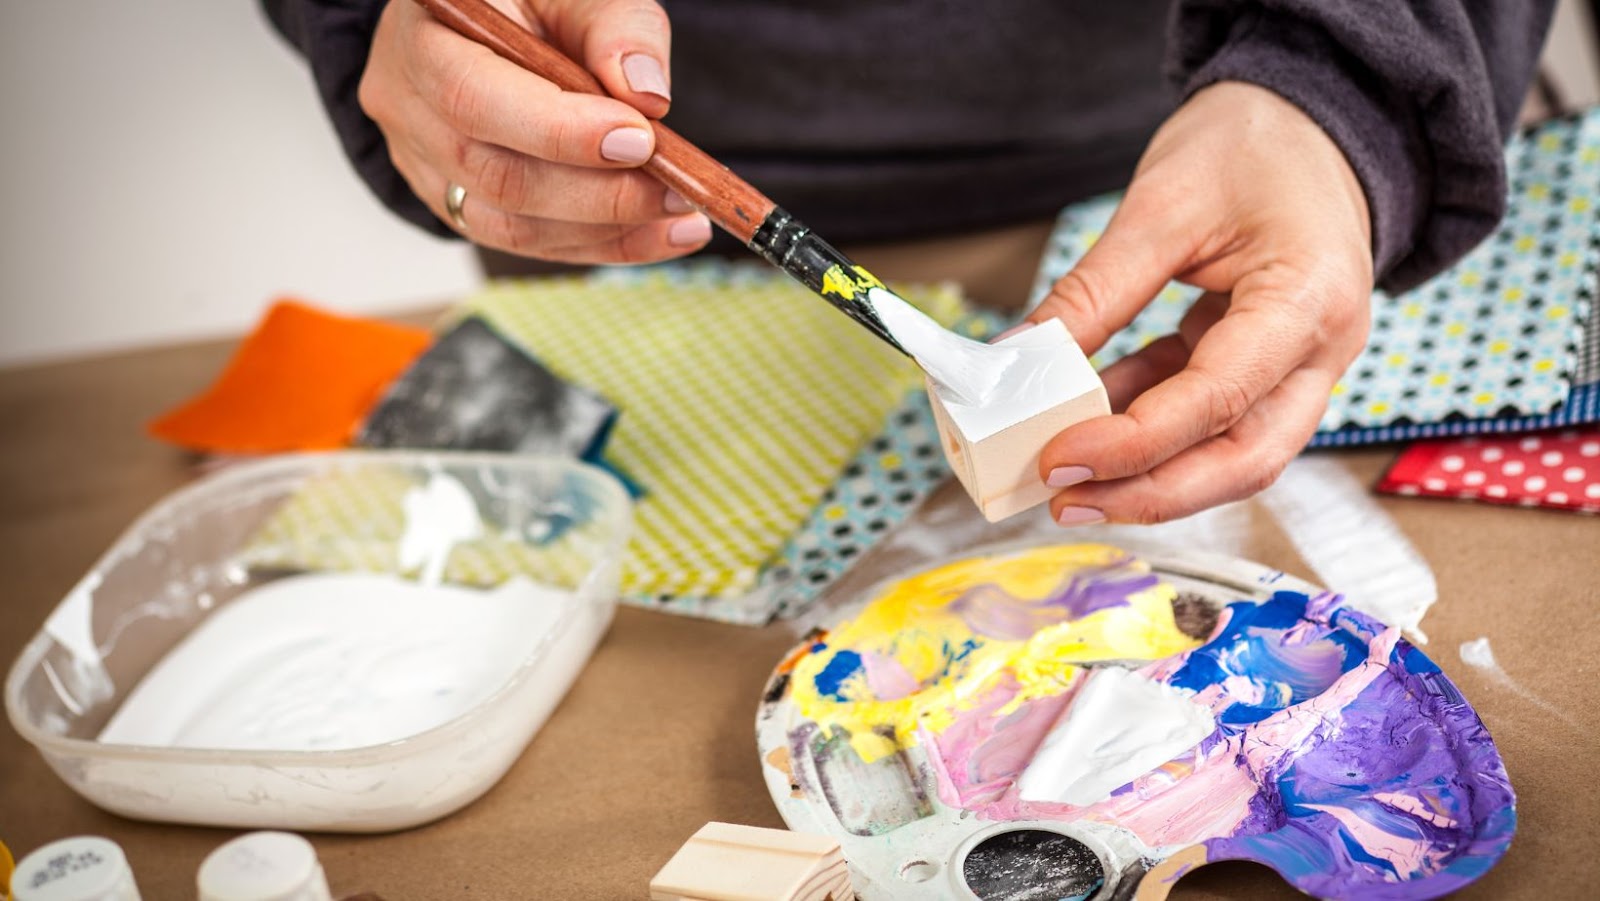
- Collect materials such as decorative paper, scissors, glue, paintbrushes and a varnish or sealant.
- Cut out your desired images or patterns and arrange them on the object in a way that looks appealing.
- Apply glue to the object and attach the cut-outs carefully.
With this guide, it’s easy to create unique decoupage masterpieces that make great gifts or decor items.
For unique details about decoupage art, keep in mind that it can be done on almost any surface – from wooden boxes and furniture to glass jars and plates. With the right materials and techniques, anyone can create beautiful pieces that are both functional and aesthetically pleasing.
If you’re looking for inspiration for your next decoupage project, consider using photographs or vintage illustrations to give it a personal touch. By paying attention to detail and layering different textures, you can create stunning crafts that truly stand out.
Finally, when making decoupage crafts, it’s essential to use quality materials such as good-quality glue – it will help hold everything in place while also giving your craft durability over time. When properly cared for, decoupage pieces can last for years as beloved heirlooms or eye-catching additions to any home decor scheme.
Time to upgrade your furniture from basic to boujee with these decoupage projects.
What is a Decoupage
To make stunning DIY projects with decoupage, explore the possibilities of personalized photo frames, decorative trays, upcycled furniture, vintage-inspired wall hangings, customized plant pots, handmade greeting cards, unique gift boxes, creative candle holders, and one-of-a-kind jewelry boxes.
Personalized photo frames
The art of decoupage is a transformative way to create personalized memories. Using the technique, one can design a range of products including bespoke picture frames. These custom-made keepsakes add a touch of elegance and identity to personal spaces.
- Personalized photo frames can be created with wood, glass, or plastic materials.
- Photos can be printed and cut into desired shapes and sizes for the decoupage application.
- Papers that match one’s interior decor or preferences can be used for the application too.
- The process involves adding layers of paper over some base, then creating designs that suit an individual’s taste and preference.
- After creating an attractive design, one needs to apply varnish over the finished product to seal everything together.
- The final product protects memory photos from fingerprints, scratches and further damage.
Unique details that give customized photo frames an edge include designs that match an individual’s interests or hobbies such as sports themes for fans or book covers for literature lovers. A perfect choice of colors with different shades and hues gives them uniqueness while blending in well with existing home decor.
Anecdotal evidence shows that personalized photo frames have been around since ancient times. Historical records indicate Byzantine history featuring rich empires and luxurious court life that crafted customized artwork for royalty using similar techniques incorporating mixed media – mosaic glass, crystals stones and precious metals- on their frames. This points out how far-reaching the use of decoupage goes in creating personalized keepsakes such as picture frames.
These decoupage trays are perfect for serving drinks and hiding the fact that you just ordered pizza.
Decorative trays
For those interested in adding a touch of creativity to their home décor, there are several decoupage projects with which one can experiment. One such project is the creation of visually appealing “Trays Adorned with Decoupaged Designs”.
The following are three quick points to consider while making these trays:
- Select sturdy yet lightweight trays as they will serve practical purposes and facilitate movement.
- Experiment with a variety of design styles, patterns, and color combinations to add personality and bring life to your space.
- Include an acrylic sealant that will shield against regular handling and maintain the longevity of the decoupage work.
While it’s important to stay focused on the main task while crafting these decorative trays, it’s also essential not to overlook the significance of being detailed-oriented. Take note that even small embellishments can make a significant difference in achieving an elegant result.
Don’t miss out on this opportunity to create impressive décor pieces that you can take pride in displaying at home. Get inspired by experimenting with different designs and styles while following simple steps for an effective outcome. Who says you need a fancy interior designer for upcycled furniture? Decoupage is the DIY hack that transforms trash into treasure.
Upcycled furniture
Upcycling old pieces of furniture into unique and personalized creations is becoming increasingly popular. In this context, let us explore the transformation of pre-loved furniture for better use.
– Reclaimed Woods – Using weathering wood for a new purpose.
– Vintage Suitcases – Converting an old suitcase into storage space.
– Pallets – Turning pallets into shelves or seating arrangements.
– Mirror Frames – Decorating worn-down frames with decoupage paper.
– Drawer Front Repurposing – Crafting drawer fronts onto cabinet doors.
– Bookcases – Changing outdated bookshelves using decoupage or fabric designs.
It is crucial to choose the right furniture piece to upcycle that can match your taste and style while adding a personal touch to your home décor. Consider selecting comfortable and visually appealing options that can last beyond temporary trends.
By embracing the art of upcycling, we contribute to reducing waste, avoiding overbuying new items, and giving these items a second life. Upcycling also allows you to save money while enjoying an exciting and fulfilling DIY project.
People often report feeling proud of their creations when sharing them with others, inspiring new ideas in their social circles. A story I remember was how one woman turned her old dresser by removing the drawers and creating unique shelves, which became the center of her living room.
Add some vintage charm to your walls with these decoupage beauties that are worth hanging onto, unlike your regrettable tattoo from college.
Vintage-inspired wall hangings
Here are four things that you need to know about creating vintage-inspired wall hangings using decoupage:
- Choose a vintage theme for your project such as old photographs, music sheets or postcards.
- Select the base for your wall hanging carefully; canvas, wooden frames or even mirrors work well.
- Cut and arrange the images in a creative way on the base and use decoupage glue to secure them in place.
- To add depth and texture, use additional embellishments like lace, buttons or ribbons.
Incorporating vintage elements into your home adds an elegant flair that stands the test of time. Decoupaging vintage-inspired wall hangings is a great way for you to express your creativity while adding unique touches of nostalgia to decorate your living space.
Creating vintage-inspired wall hangings has been popular for generations. The art of decoupage dates back centuries when it was used mainly for restoration purposes. With modern materials and techniques available today, it’s easier than ever before to create beautiful works of art using this traditional craft.
Don’t let your plants suffer from an identity crisis – give them some character with these decoupaged pots.
Customized plant pots
Creating Personalized Plant Containers with Decoupage
Plant containers serve as a significant part of indoor and outdoor decoration. With decoupage, it’s easy to transform plain plant pots into decorative ones. Here are some ways to customize your plant containers using decoupage:
- Use various kinds of tissue papers, napkins, or newspapers with designs to wrap around the pot with decoupage glue for a water-resistant finish.
- Print images or quotes that you like on normal paper or photo paper for a personalized touch.
- Try using different colors of paint on the pot before covering it in your chosen pattern/design to add depth and texture.
- Add elements such as lace, ribbons, or beads onto the pot’s surface for an intricate decoration that is eye-catching.
- Experiment with gold leaf accents or metallic paints for a luxurious touch that enhances the details of the design.
- To create mosaic patterns, break up recycled porcelain items such as cups, plates, and saucers into small pieces and paste them onto plant pots for more sturdy design and structure.
Expanding on these ideas requires creativity but offers an effortless method to decorate nondescript pots and make them new again. Step by step tutorials are available online with many easily available materials on websites like Pinterest.